

How to Correct Mistakes when Using Colored Pencils

Mistakes happen! A colored pencil mistake doesn’t have to mean that you trash the piece.
One Major Drawback to Colored Pencils
Colored pencils don’t really erase well. This can be a real problem if you are creating a piece and you make a mistake. What should you do?
4 Pre-mistake Strategies
Before I go into three methods of fixing colored pencil mistakes, I’d like to point out four strategies that can help you before you make a mistake. It can be really hard to fix major mistakes when using colored pencils, so it’s better to start out with a plan that minimizes making them to begin with.

An example of varying pressures using colored pencils. I used wax-based pencils here which lay on thicker and are “stickier”. Hold the pencil loosely and further from the point to try and get a light layer of color. Hold the pencil closer to the tip to create harder pressure.
Use Light Pressure
Always use light pressure at the beginning of drawing a piece. This not only makes it easier to add layers on top of the first layer, but it will help you to be able to erase if you used light pressure. When I was a beginner with colored pencils, I really didn’t understand what “light” pressure meant. Everyone kept saying “use light pressure”, but I was confused by this. Check out the picture above to see an example of light, medium, and hard pressure using a Prismacolor Premier pencil to see what I mean. Hopefully, that will help you to understand more about pressure than I did in the beginning.
Basically, light pressure means try not to leave much pigment on the paper and holding the pencil very loosely. I probably could have made a lighter mark in my example, but I am not used to working on Bristol vellum paper. I think it’s easier to apply a light layer on Clairefontaine pastelmat.
My method of drawing always includes mapping out things with light pressure to make sure I have the locations, colors, and shapes correctly drawn. That way it is easier to change course if I am wrong. As I progress and feel more confident, I apply more layers and pressure. This is the safest way for me to avoid making large mistakes.
Use Oil-based Pencils
Oil-based pencils erase easier than wax-based pencils. That’s not to say that you shouldn’t use wax-based pencils if you want to. It’s just something to be cognizant of while creating your artwork. Be extra careful with wax-based pencils. You’ll be able to see what I mean when I show pictures of trying to remove wax-based pigment later in this blog.
Use Clairefontaine Pastelmat or Drafting Film
I love, love, love these two surfaces. They are more forgiving than hot-pressed paper or Bristol papers. I started my colored pencil journey on colored pencil drawing paper, which is similar to Bristol vellum only not as thick. It’s not terribly forgiving especially considering I started drawing with Prismacolor wax-based pencils.
I was amazed once I figured out how to use Clairefontaine Pastelmat. It has a lot of tooth in it, and as long as you are using lighter pressure to build layers (especially with oil-based pencils) you can remove pigment fairly easily. In fact, I do this all of the time not to fix mistakes, but to create texture and highlights.
Drafting film surface is different than pastelmat because it doesn’t have much tooth at all. When you draw on drafting film you can’t have many layers because of the lack of tooth, but the positive about it is that you can erase very easily with a kneaded eraser or a Tombow Mono eraser. You can easily fix mistakes and also create texture and highlights on this surface as well.
That said, you will still be able to create beautiful pieces on other papers as well. They just aren’t as forgiving.
Put A Light Base Layer Down First
Sometimes I put a light hue pencil as my base layer and this helps me to erase easier. For example, if I am drawing a brown dog, in the lighter value areas I might put down a layer of Prismacolor Cream first before adding Dark Umber. Then if I need to change course it seems easier to remove the top layer than if I put a layer of Dark Umber down first. I think this method works best with hot-pressed and Bristol papers and wax-based pencils. Play around with this method if you think it will suit you.
3 Post-mistake Strategies
Okay, so you’ve made a boo-boo. Now what? Don’t fear! Try one or all of these methods to see if you can salvage your mistake.

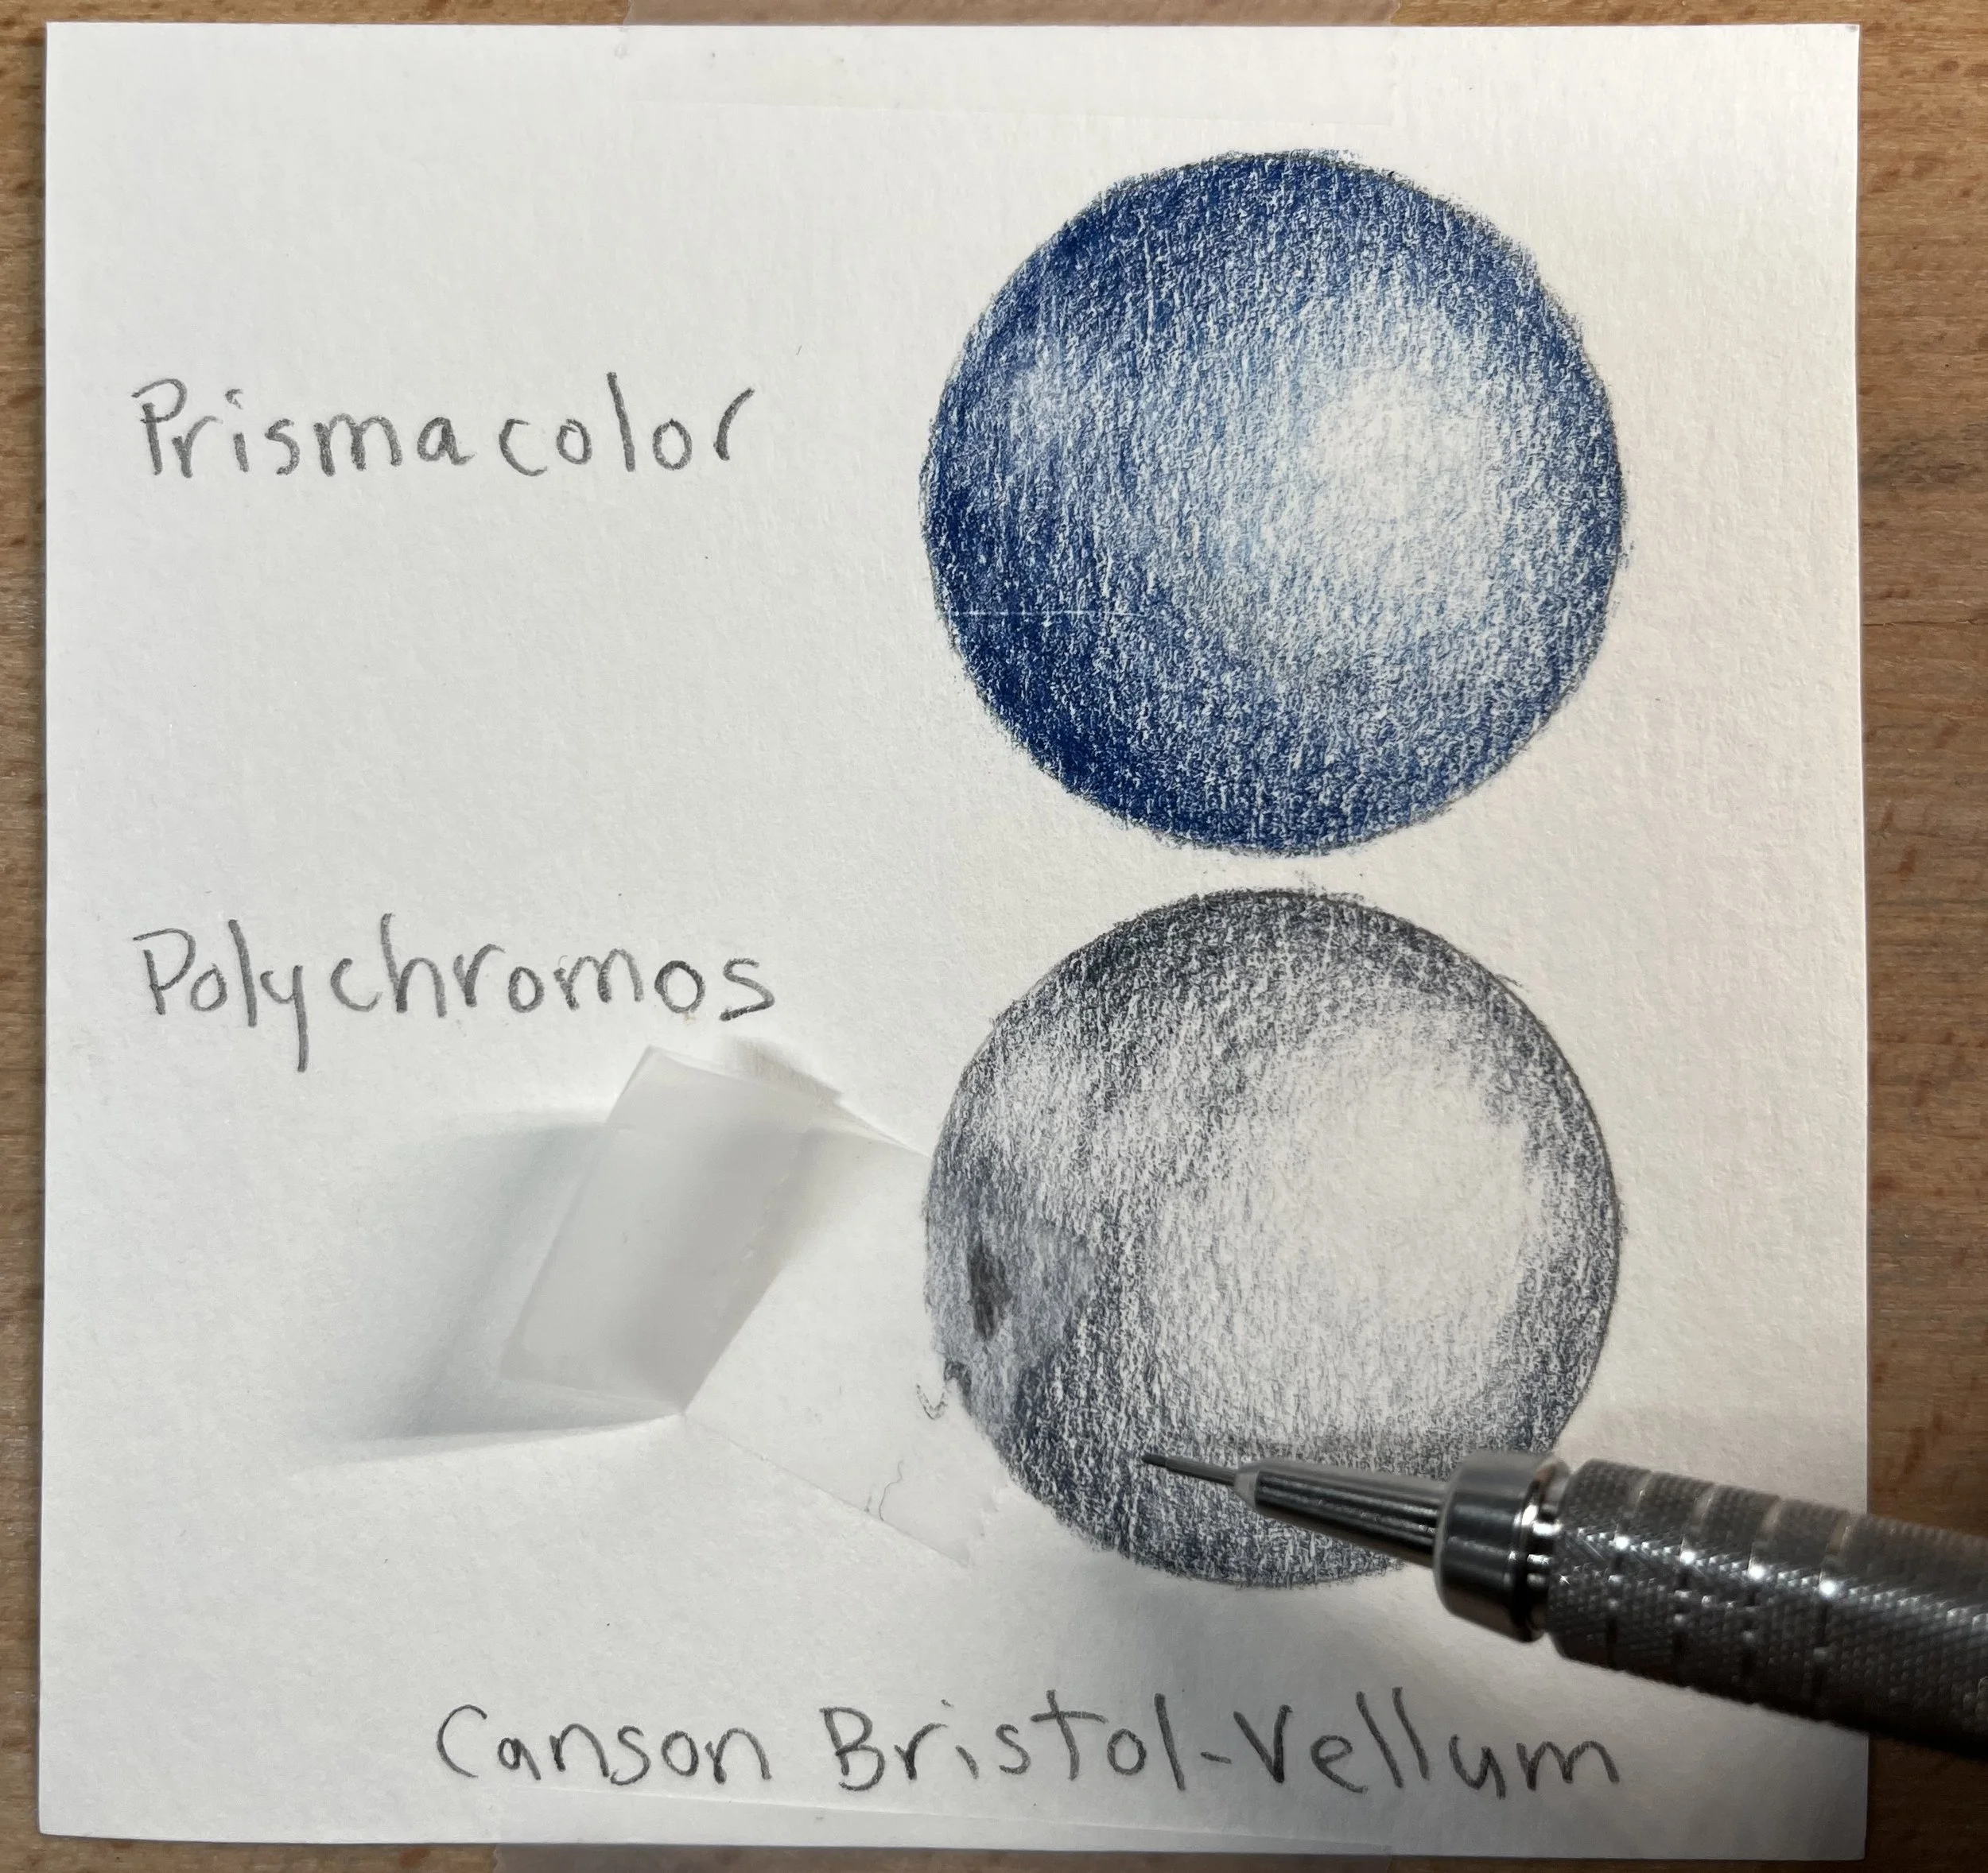
Here you can see where I used the putty eraser to remove pigment from a wax-based pencil on top and an oil-based pencil on the bottom. Both hues were indigo. The whitish blotches on the left side of the spheres are where I tried to remove pigment. Note that it is easier to remove oil-based pigment. The paper type was Canson Bristol-Vellum.
Putty Eraser
This is one of my favorite cheap art tools, and I always have one with me while I’m drawing. I love putty erasers because you can shape them to fit where you want to remove pigment. I will admit that if you have made a major mistake, the putty eraser may not be your solution, but you can at least start with it. If you warm it up a bit in your hands first it seems to be able to grab pigment from the paper better. Use a dabbing motion instead of a dragging motion like you would use with the top of a pencil. If this method fails, move on to options 2 and/or 3. See the picture above to check out how well it was able to remove pigment in my experiment.
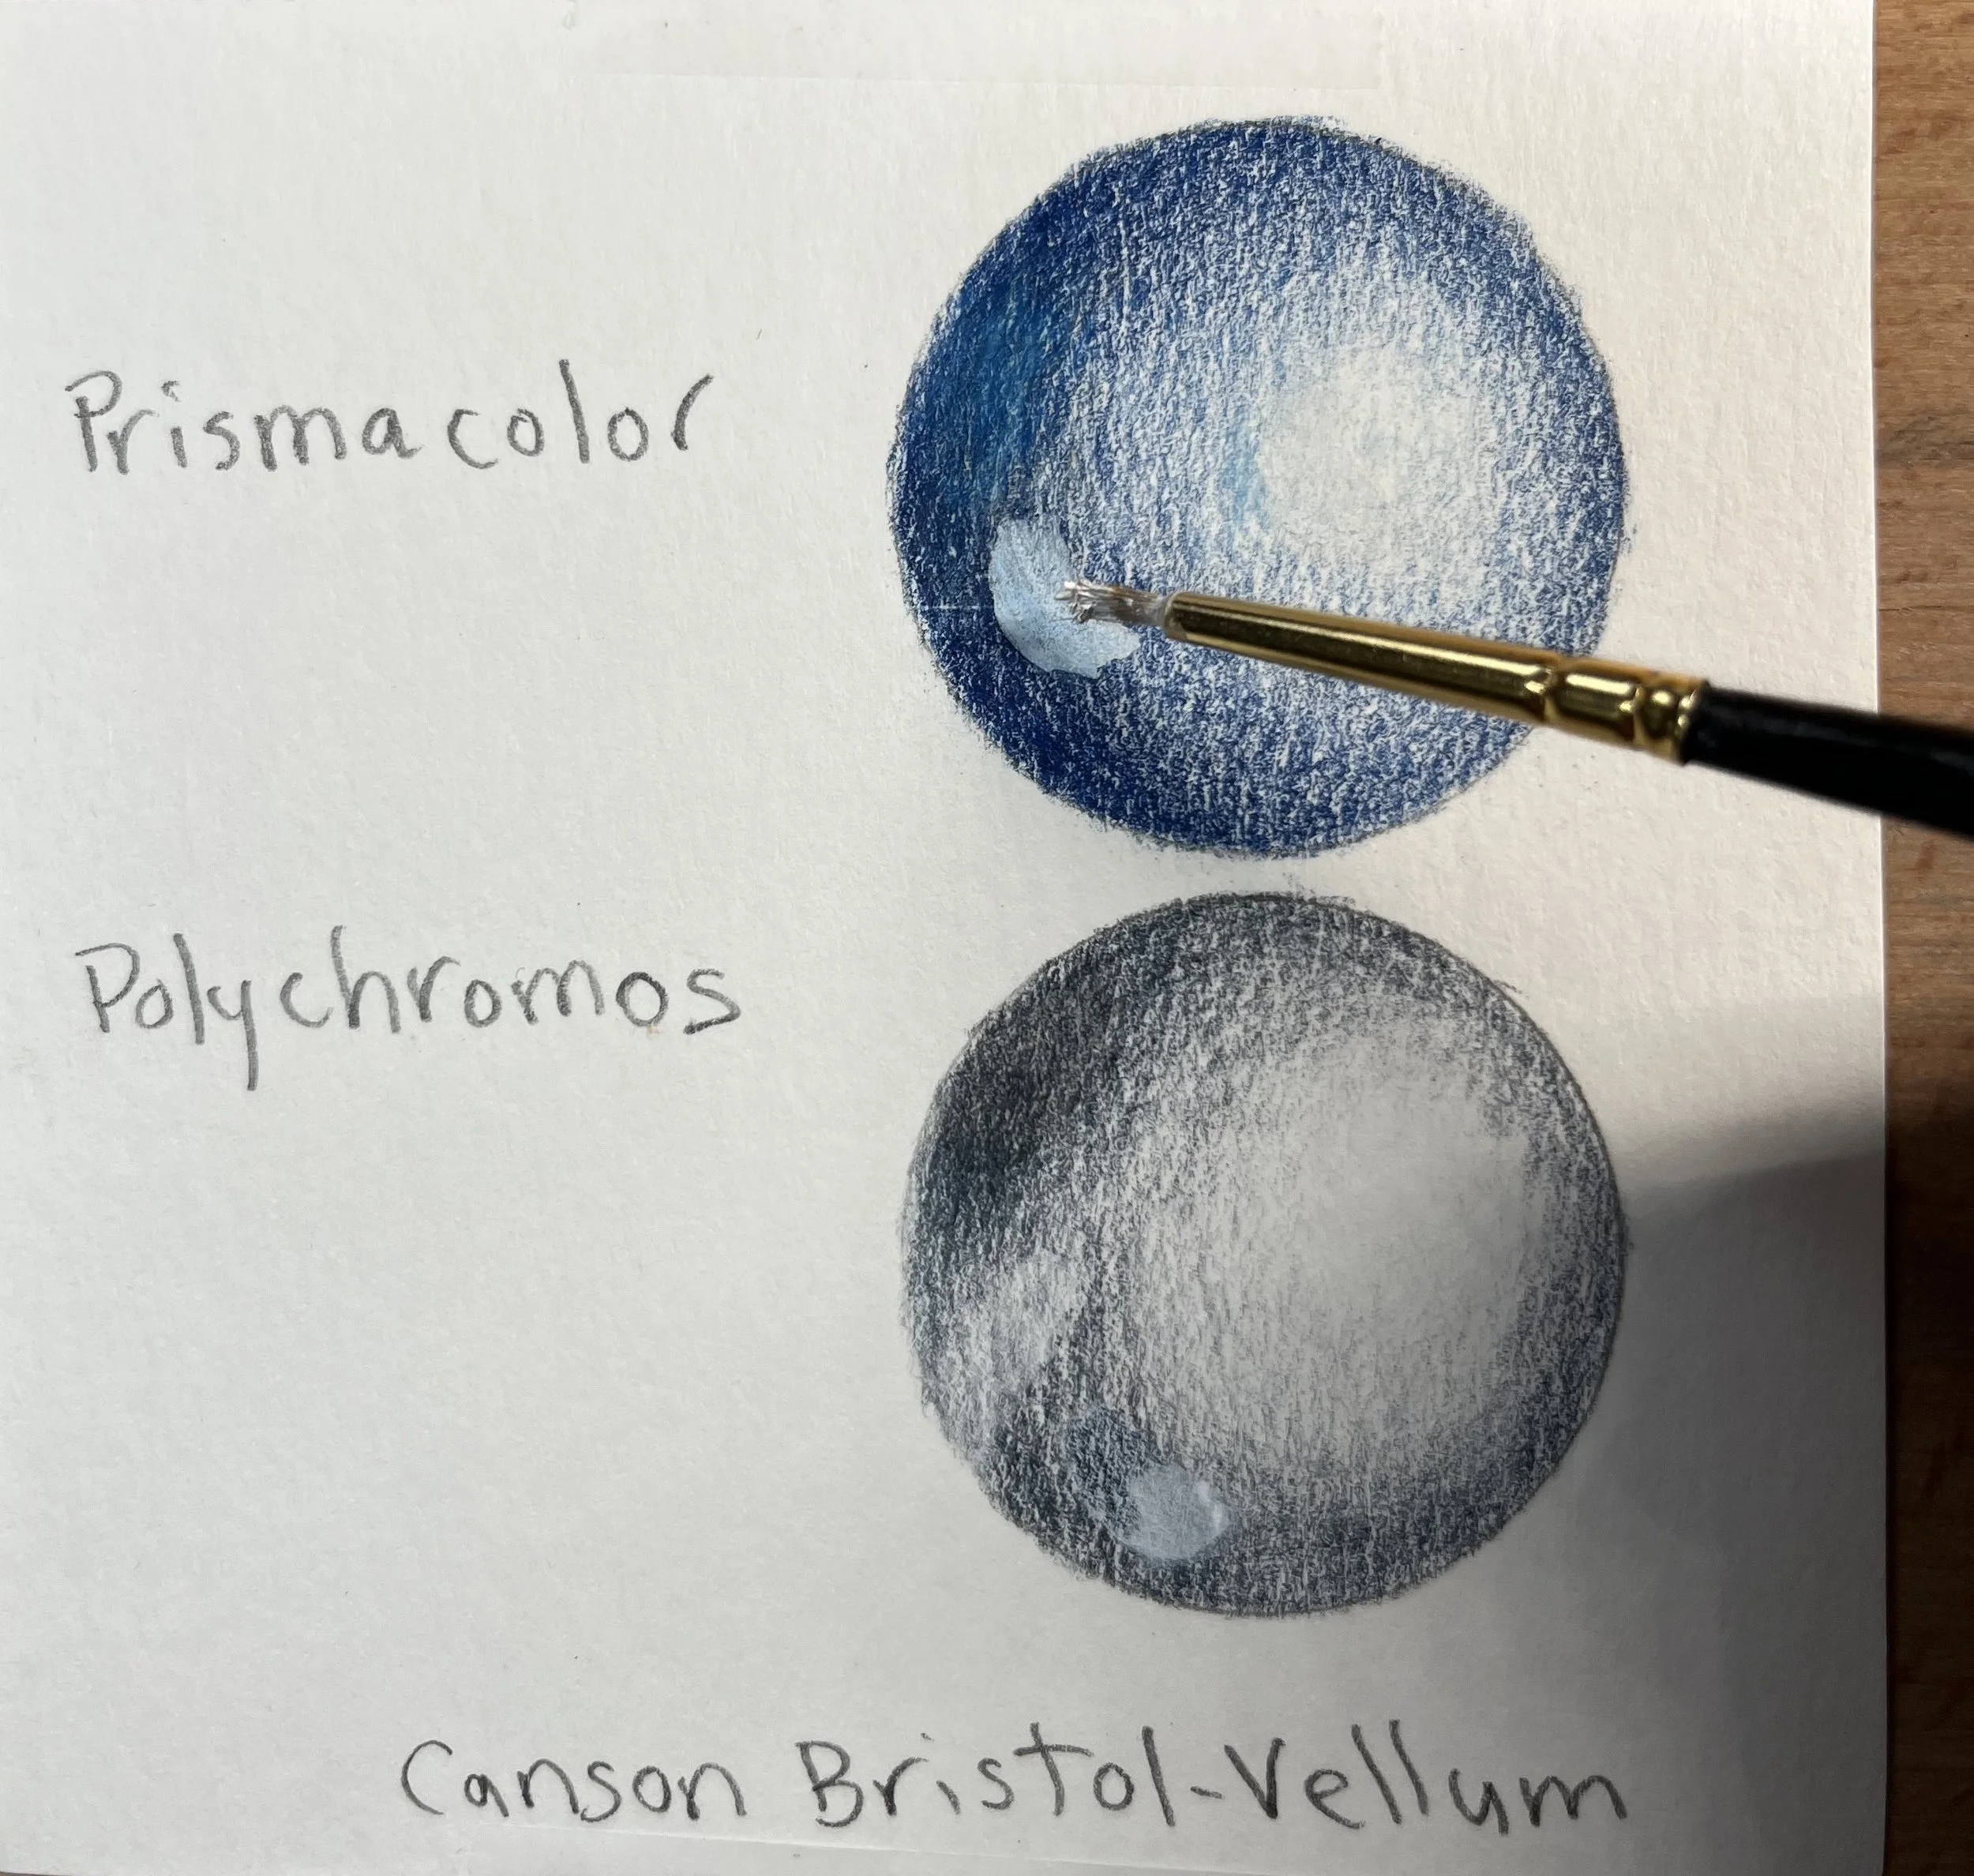
The tape didn’t remove much pigment from the Prismacolor sphere. I put the tape in the same spot where I put the kneaded eraser. It removed a bit more pigment, but that wax-based pencil is stubborn! You can see how I put the tape on the sphere over the Polychromos sphere. Make sure you either hold the tape up with your finger or fold the tape back so that the whole piece doesn’t get stuck on your paper. In the last image below, you’ll be able to see how much pigment this tape took off, which was a good bit. It was actually taking off pigment anywhere the tape touched, so it’s definitely more effective with oil-based pencils.
2. Scotch Magic Tape
I love this stuff, and I buy it in multi-packs. This method will remove more pigment than the putty eraser, and it might be all you need to fix your mistake depending on how much pigment you need to erase and what color it is (darker colors are harder to fix!).
Gently put the tape on your paper, but make sure you leave one end still sticking up so that you can pull it off. Don’t rub the tape in at all or you might damage your paper. Then use a sharp pencil to lightly rub over the area that you would like to remove. Lift the tape to check your progress. You may need to do this a few times, and it might not remove all of the pigment, but it should definitely lighten the mistake area. Be careful where you lay the tape, because it can pull up pigment where you might not want it to. At this point hopefully, you can draw over it and fix your piece. In the worst-case scenario, you may have to move on to method number 3.
Something to keep in mind about the Scotch-magic tape is the type of paper you are using. In my experience, it is easier to tear a paper such as hot press, bristol vellum, or bristol smooth. If you are using one of these types of paper, you may want to remove a little of the stick of the tape beforehand by sticking it on your pants, for example. When I do this, I pull off a few dog hairs which stick on the tape, but it will still do the trick.
3. Colored Pencil Touch-up Texture and Brush and Pencil Colored Pencil Titanium White
Here is your last resort, and it can be very helpful. It was created by, Alyona Nickelsen, a colored pencil artist who invented a way to fix mistakes. Alyona is an amazing artist (understatement) who also has written some very helpful books on how to “paint” with colored pencils. I have her book, Colored Pencil Painting Bible, and I highly recommend it.
Back to fixing mistakes- you’ll need to purchase at least the Touch-up texture, but I recommend you purchase both items: the Brush and Pencil Brush and Pencil Touch-up Texture and the Colored Pencil Titanium White. The two will set you back around $24 at the time I am writing this blog, but they are worth it!
The Touch-up Texture is a liquid and the Titanium White is a powder. If you are working on a toned piece of paper or you are working on an area that you will be covering with darker hues, you should just use the Touch-up Texture. Simply paint it over the mistake area and let it dry. It creates a texture for you to draw on that mimics the tooth of the paper.
This will also help in areas where you may have worn down the tooth of the paper so much that you can’t add additional layers. Keep in mind, however, that you shouldn’t use this for large areas. It works best for smaller areas.
Let’s say that you made a mistake over an area that you want to be light or even white. Then you might want to use the two products together to fix a mistake. In order to do this you have to mix the two products into a paint-like consistency before you use them. Then you brush the mixture over your mistake area and let it dry. After that, just draw over the top of it and if all goes well, your mistake will be invisible. You should try a bit of the mixture on a scratch piece of the surface you are using first, though. It’s an awesome tool, but it might not be right for your particular mistake, so you’ll want to practice first.
Conclusion
Mistakes will certainly happen when you are creating a colored pencil piece. But this doesn’t mean that you can’t salvage your piece! It is my hope that you will find these pre and post-mistake strategies helpful to minimize mistakes and/or to aid you when a mistake does occur.
Did you find this blog helpful? Have you ever tried any of these methods? Do you have any other ways to fix mistakes that I didn’t list?