

10 Tips to Ensure A Great Photo of Your Pet
Here are some thoughts on how to get the best reference photo of your furry friend:
Take your picture outside or at the very least next to a window. Natural light really is the best when it comes to illuminating a subject. It’s hard to see detail when the subject is lit with artificial light. Indoor lighting doesn’t provide contrast and clarity to the same degree as natural light. Some of the most interesting photographs to work from show an animal that is partially illuminated in sunlight and partially in shadow. Scroll down to see some examples of well lit and poorly lit photos.
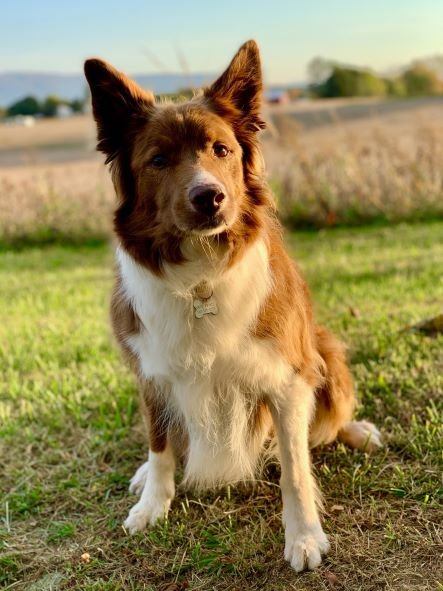
If you really want to capture an amazing shot, take your picture during the golden hour. This occurs an hour after sunrise or an hour before sunset. Try for a day with a clear sky with little to no clouds. See if you can get your pet in a place where there is direct sun or where light is coming through something like trees. Take a look at the picture of Opie to see an example of a photo with good lighting. Also, the picture of Addie in the woods shows light filtering through trees, which would make for an interesting piece.
- Make sure the resolution of your photograph is suitable enough to see
detail. Most newer versions of camera phones automtically have decent resolution. To test this, zoom into your photo and observe if it is
clear versus pixelated (when you can see little squares of color). It is easier to make a clear photo into a
much better portrait. This is because details can be seen, which make portraits more life-like.
If you are using an iPhone, make sure your phone is not taking pictures in the new format, HEIC. This format has become default on many phones rather than JPEG/JPG. HEIC format is great because it minimizes storage, but it doesn't provide as much detail in photographs. To check your setting go to "Settings", "Camera", and select "Most Compatible".
- Get eye level with your animal. Looking down on your pet can make him or her look out of proportion. Unless of course, this is the look you are going for. The picture of Paul the pug below is shot with a downward facing view.
- Consider what kind of portrait you would like of your furry friend, and let that help you to consider what photograph should be the best reference. Would you prefer a head shot or a full body shot? Would you like your pet to be active or sitting still? Maybe you would like an action shot that shows your pet swimming, playing with yarn, or fetching a ball. The sky is the limit and this is really up to your preference.
- Fill the view finder of your phone or camera with your pet. It is much better to create an artwork from a close up shot than a far away shot. If you try and zoom in on photo that was taken from far away, the animal will appear blurry.
- Images copied and pasted from social media websites don't have great resolution. Pictures that are posted on social media are compressed when they are uploaded, and so they can't be used to see detail. If at all possible, try and get the original photo for the reference picture.
- If you are using an iPhone camera, tap the yellow focus square over your animal before you capture the shot. This will ensure that your beloved pet is in focus.
- Play around with the settings of your iphone. The square photo feature could make for an interesting portrait. Or the portrait feature will automatically blur out the background. Addtonally if you take "live pictures" on your iPhone, it might be possible to extract an excellent photo from the live photo range. If you are not comfortable playing with these settings, I can use photoshop to do different effects if you so choose.
- If you can't get the perfect photograph, don't fret. I can do things to make reference photos more appealing by cropping, adjusting brightness and tone, extrapolating features that may look better in the drawing, or adding a new background. Best practice is to take a bunch of pictures and we can decide what might make the best portrait for your pet.

Paul the pug is adorable. Note how his body is out of proportion because his mom was looking down on him while she took the picture. If you don’t want that effect, make sure you get eye level with your pet.

This picture of my dog, Lakota, was taken during the Golden hour in the morning. Note how crisp everything looks in the photograph. There is also a golden hue, which is why that time period was so named. It is hard to capture detail on dark animals, and being outside really helps with that dilemma.

For this example, note the lack of detail, how the cat doesn’t fill the shot, and the darkness of the photo. I would choose not to use this photo, because I would not be able to use it to create a good drawing.
Opie’s photo was ideal to work from. Note the light coming from the right side of his face. It provides immediate interest to the piece. It enabled me to render the cool colors of the shadows on the left of Opie and the warm colors of the right side of which gave depth to the piece. Additionally, the background is amazing because it’s lovely, and it gives context to Opie’s story.

This is also a great reference photo even though AB and Kelly don’t take up the whole shot. The background was lovely and the resolution was good enough so that I could tweak the photo by zooming in, removing the bridge and adding some sky.

Look at this example of a not-so-great shot. I took this of my dog, Addie, trying to mimic a favorite painting of mine called “Master Bedroom”, by Andrew Wyeth. There is natural light coming in on the right side of the photo, but the room is so dark, it makes it very hard to see her details. If I tried to make a decent drawing out of this photo, it would be very difficult due to limited information on the photo.

Here is a better reference photo of Addie. Although she is in the woods, there is sunlight coming in through the trees which makes for an interesting portrait. If I were to draw this picture, I would center up the picture and add the rest of her front legs to show her whole body.
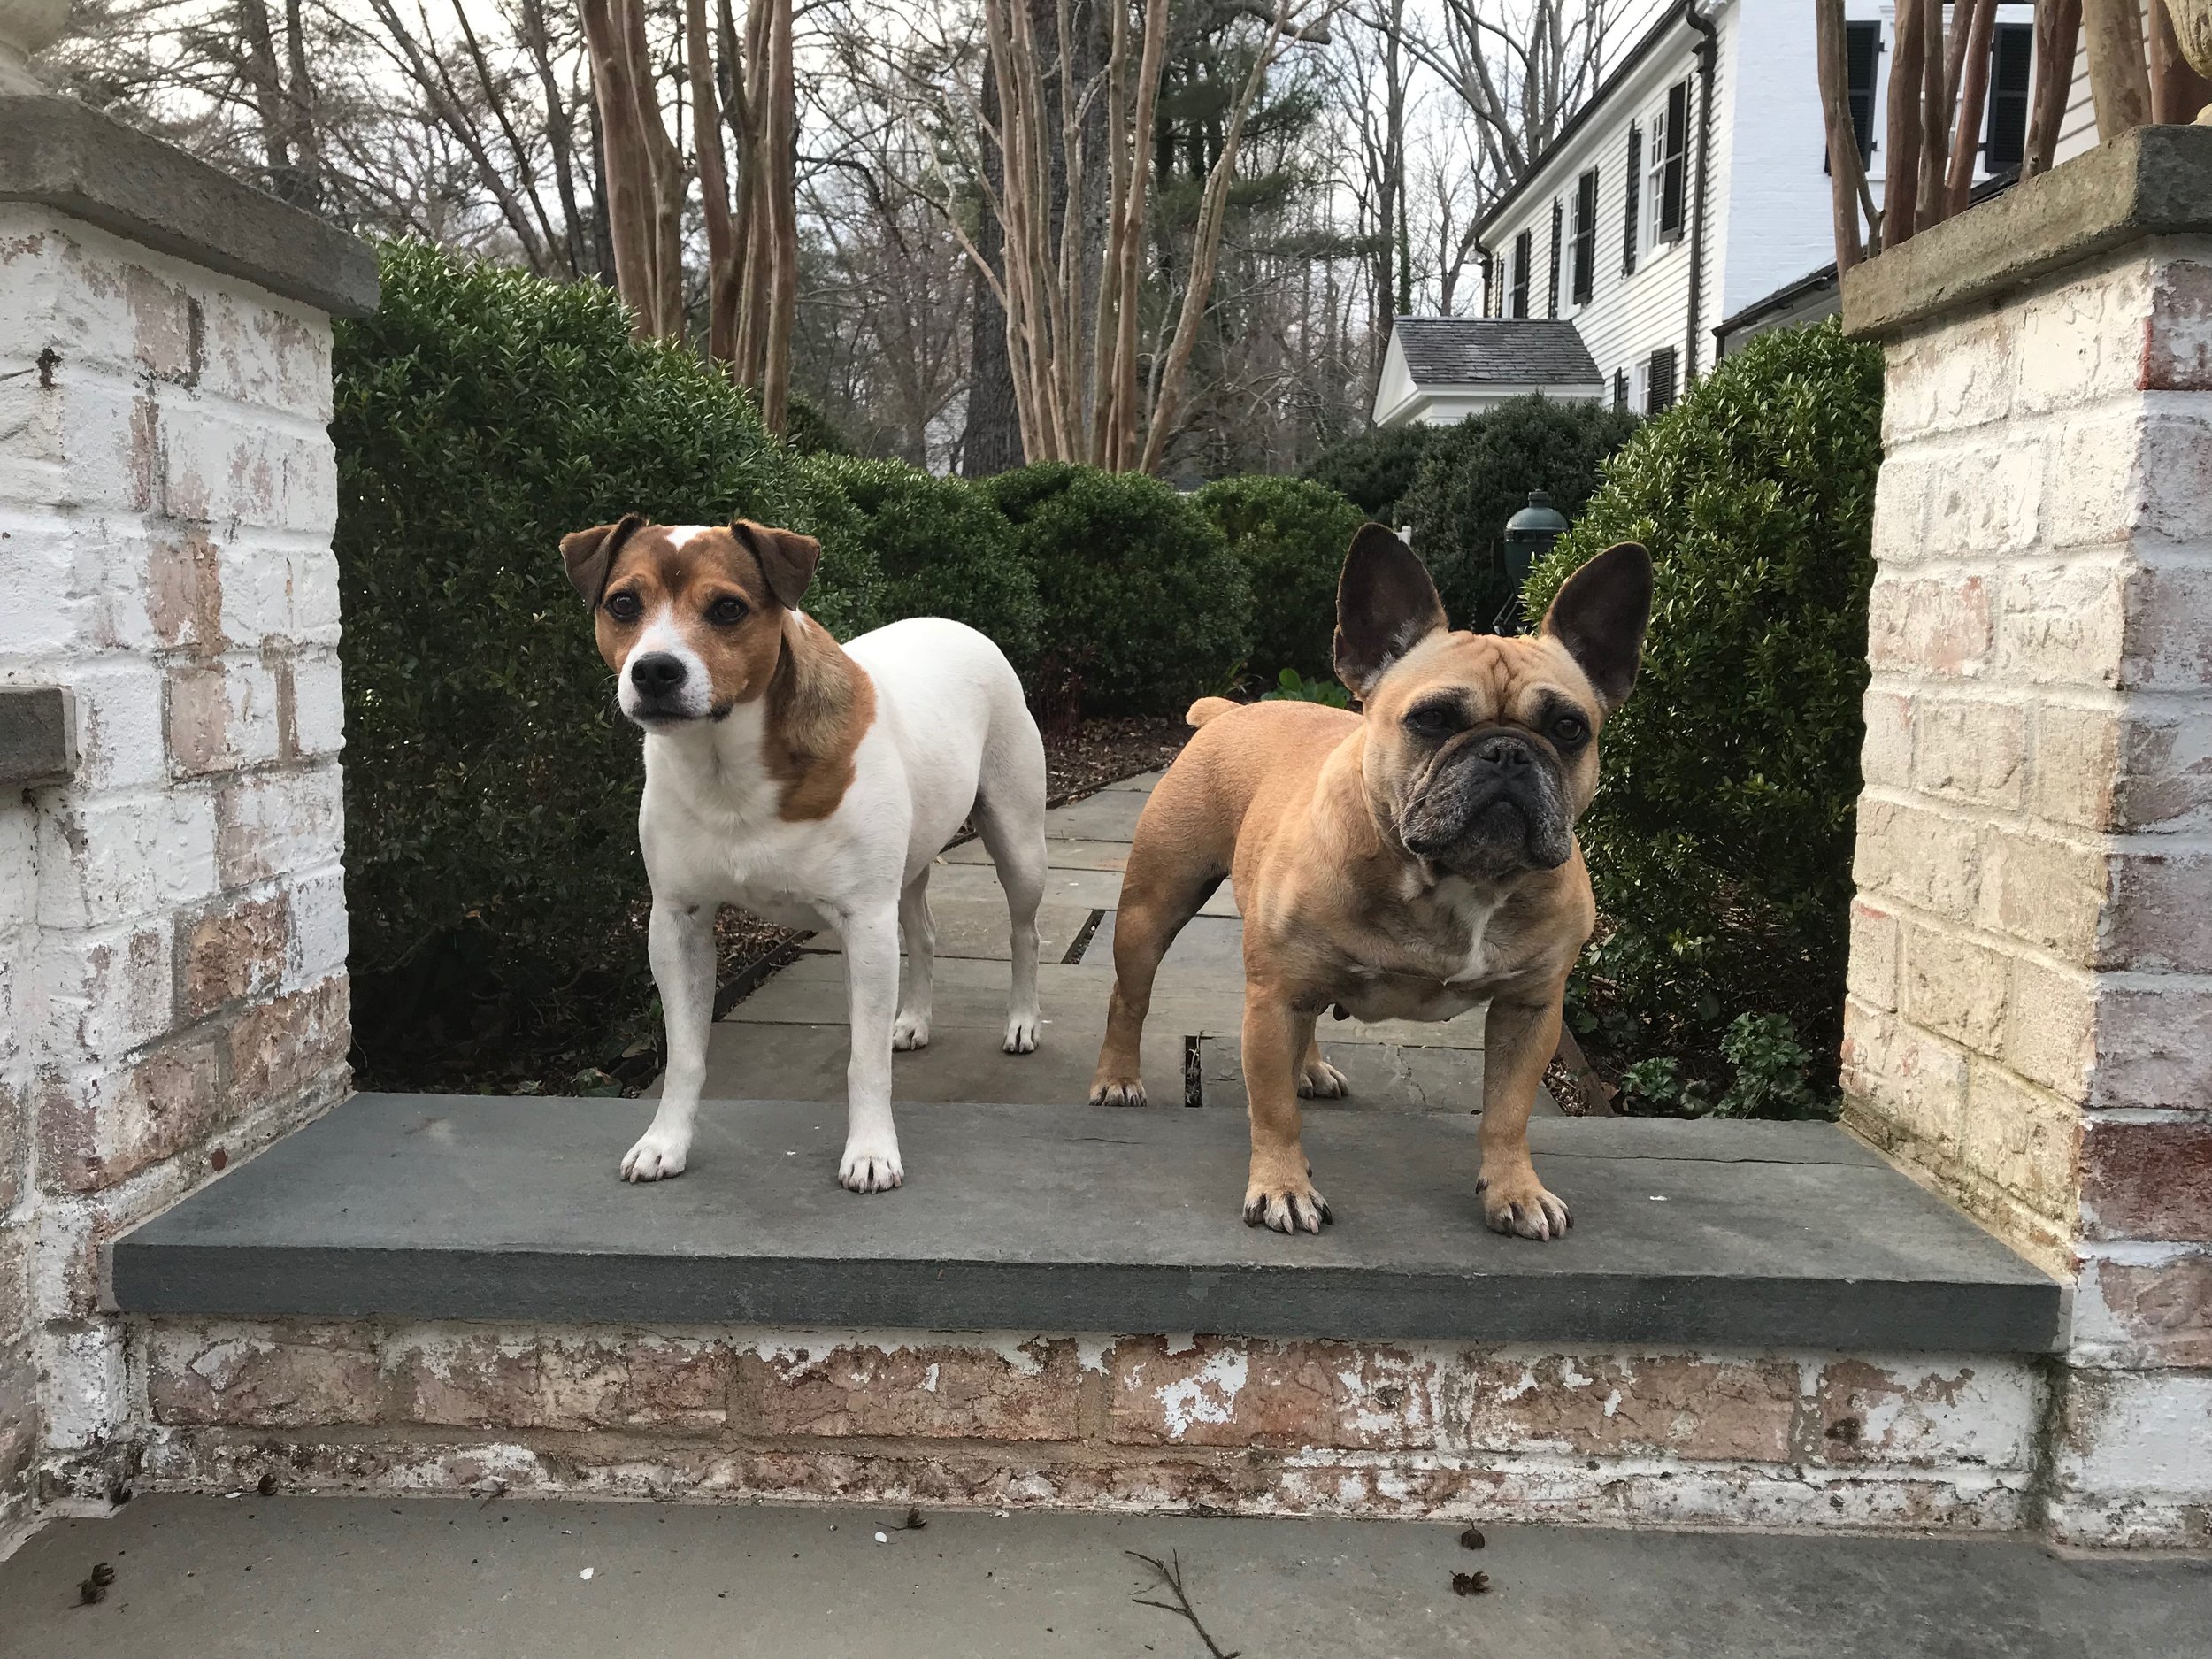
The picture of Derby and Lulu was taken outside, although on a cloudy day. Even though the sun was not bright on this day, the photograph is still well lit and shows plenty of detail and some shadow. The difference with a cloudy day is that the sunlight is diffused through the clouds, which makes the light more evenly dispersed. As a result the light and shadow areas are not high in contrast. It still made for a great reference photo, and this may actually be a lighting look that some people prefer. So if you like softer lighting like this, try and get a photo on a cloudy day.

I love this picture of Peppy. Peppy’s mom zoomed in and captured a lovely shot of him, probably next to a window. The lighting of the picture helps us to see Peppy’s beautiful features, and also provides a nice contrast to the black background. I drew this one in pencil a few years ago, but I would love to redo it with colored pencils or pastels.